
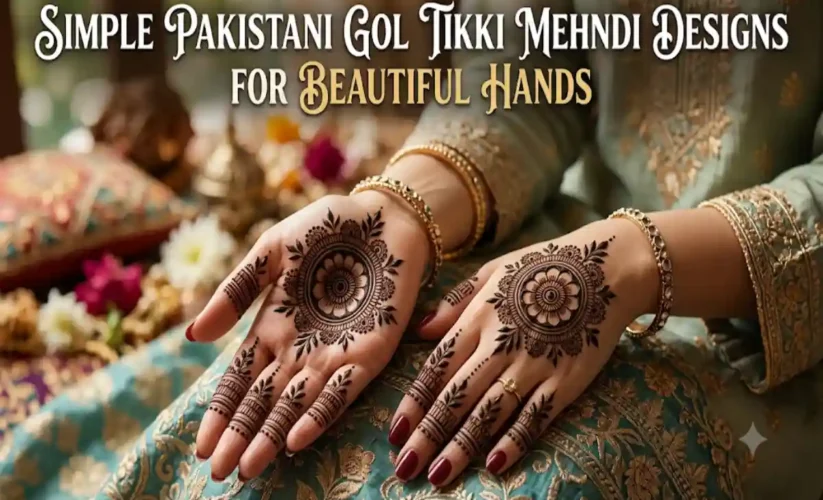
15 Simple Pakistani Gol Tikki Mehndi Designs for Beautiful Hands
Mehndi is an integral part of celebrations in South Asia, particularly during Eid, weddings, engagements, and family functions. The gol tikki mehndi designs are widely popular among numerous mehndi patterns because of their eye-catching circles, detail, and overall regal look.
Simple Pakistani gol tikki mehndi designs are suitable for women who like to keep their mehndi design to a minimum. This design is usually a simple central circle with a pattern of (esp), leaves, leaves, and geometric border lines with petals and dots surrounding it.
If you are new to mehndi or an experienced artist, gol tikki patterns have so many creative options to choose from. Check out these 15 beautiful ideas for gol tikki mehndi designs and practical advice to help you pick and apply them.
Definition of a Gol Tikki Mehndi Design
A gol tikki is a round pattern of mehndi commonly applied in the centre of the palm or on the back of the hand. This design can be created with a geometric pattern or full with flowers.
The main elements include:
- A central filled circle or flower.
- Decorative circular borders.
- Small petals and leafy patterns.
- Dots and curved lines.
- Paisley and net-style details.
- Matching finger decorations.
The biggest advantage of this design is its flexibility. You can keep it minimal for everyday occasions or add intricate details for weddings and festivals.
Simple Pakistani Gol Tikki Mehndi Designs
| No. | Design Idea | Main Features | Best For |
|---|---|---|---|
| 1 | Classic Gol Tikki | Filled circle with dotted border | Beginners |
| 2 | Floral Tikki | Flower surrounded by petals | Eid |
| 3 | Double Circle Tikki | Two decorative circular rings | Casual functions |
| 4 | Leaf Border Tikki | Small leaves around the circle | Traditional occasions |
| 5 | Dotted Tikki | Multiple dotted circular borders | Minimal look |
| 6 | Jaal Tikki | Fine net pattern inside the circle | Weddings |
| 7 | Lotus Tikki | Lotus flower with circular detailing | Festivals |
| 8 | Back-Hand Tikki | Circular motif with finger trails | Parties |
| 9 | Paisley Tikki | Paisley shapes around the border | Engagements |
| 10 | Bold Centre Tikki | Dark centre with outlined petals | Festive wear |
| 11 | Triple Tikki | Three connected circular motifs | Modern styling |
| 12 | Finger-Tip Tikki | Central circle with decorated fingertips | Eid |
| 13 | Bracelet Tikki | Circular motif with wristband detailing | Weddings |
| 14 | Minimal Tikki | Small flower with open spaces | Everyday wear |
| 15 | Mandala Tikki | Layered flowers and geometric patterns | Bridal functions |
Each pattern can be customised by changing the circle size, petal arrangement or border decoration.
Popular Types of Gol Tikki Mehndi Patterns
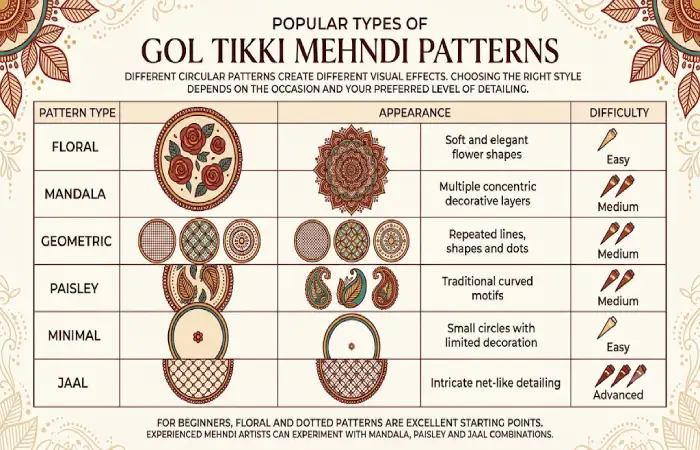
Different circular patterns create different visual effects. Choosing the right style depends on the occasion and your preferred level of detailing.
| Pattern Type | Appearance | Difficulty |
|---|---|---|
| Floral | Soft and elegant flower shapes | Easy |
| Mandala | Multiple concentric decorative layers | Medium |
| Geometric | Repeated lines, shapes and dots | Medium |
| Paisley | Traditional curved motifs | Medium |
| Minimal | Small circles with limited decoration | Easy |
| Jaal | Intricate net-like detailing | Advanced |
For beginners, floral and dotted patterns are excellent starting points. Experienced mehndi artists can experiment with mandala, paisley and jaal combinations.
Front-Hand vs Back-Hand Gol Tikki Designs
Gol tikki patterns look attractive on both sides of the hand, but their placement changes the overall appearance.
| Feature | Front-Hand Design | Back-Hand Design |
|---|---|---|
| Placement | Centre of the palm | Centre of the back of the hand |
| Popular motifs | Floral circles and mandalas | Circular motifs and finger trails |
| Detailing | Finger decorations and borders | Bracelet patterns and leafy chains |
| Overall look | Traditional and festive | Delicate and jewellery-inspired |
| Best occasions | Eid and weddings | Engagements and parties |
A front-hand tikki is a good choice for people who want a traditional appearance, while a back-hand design works well for those who prefer lighter decorative patterns.
How to Apply a Simple Gol Tikki Mehndi Design
Creating a neat circular mehndi pattern becomes easier when you follow a few basic steps.
| Step | Application Technique |
|---|---|
| 1. Prepare the hand | Wash and dry the skin properly. |
| 2. Draw the centre | Make a small dot in the middle of the palm. |
| 3. Create a circle | Draw a smooth circular outline around the dot. |
| 4. Add decoration | Fill the centre with a flower or geometric pattern. |
| 5. Draw petals | Add evenly spaced petals around the circle. |
| 6. Create borders | Decorate the outer edge with dots, leaves or arches. |
| 7. Decorate fingers | Add small flowers, lines or traditional bands. |
Practising the design on paper before applying it to the hand can help improve accuracy and symmetry.
Tips for Making Your Gol Tikki Mehndi Look Beautiful
Have you got a lovely circular design but not sure how to get the best from the design? Sometimes small enhancements to your application can make a big difference.
- Maintain balance: Ensure petals and decorative edges are evenly spaced.
- Choose the circle sizes carefully: Don’t scale the center motif to an excessive size for the palm area.
- Mix fat and skinny lines: Put down bold edges and more refined accents.
- Leave empty space: Do not make the entire design filled with excessive decoration.
- Repeat the finger with the same floral or geometric design.
- Improve cone control by drawing circles and small petals.
Which Gol Tikki Mehndi Design Is Best for Different Occasions?
| Occasion | Recommended Pattern |
|---|---|
| Eid | Floral tikki with dotted borders |
| Wedding | Detailed mandala tikki |
| Engagement | Bracelet-style circular design |
| Dholki | Lotus or paisley tikki |
| Family gathering | Classic gol tikki |
| Casual outing | Minimal open-space design |
| Bridal function | Layered floral and jaal pattern |
Patterns for everyday use are generally adequate for the general requirements. At weddings or bigger occasions, you can include additional digits as well as extra outers to give a degree of richness.
How to Get a Darker Mehndi Stain
Mehndi’s colour is influenced by the henna paste, as well as skin, and its application method.
Follow these basic recommendations:
Apply henna to clean, dry skin.
Use fresh, good-quality natural henna paste.
Allow the paste to dry naturally.
Follow the recommended setting time.
Do not wash off the design immediately after lifting the dried paste.
The natural henna stain normally appears as an orange-brown to reddish-brown. Stay away from black henna that contains bad ingredients such as PPD which have been linked to severe skin reactions.
Frequently Asked Questions
1. What is the easiest gol tikki mehndi design?
Encased “divided circle” with few asphalts dotted around the round.
2. Are Pakistani gol tikki mehndi designs suitable for Eid?
Yes. Festival time dictates use of floral circles, lotus patterns and dotted borders to bring in the festivities.
3. Can gol tikki be applied to the back of the hand?
Yes. Lined up small circle motifs along with finger trails and bracelet type motifs will look good on back of hand.
4. What is the time required for making a gol tikki simple design?
Regular designs could be completed in approximately 5-10 minutes while intricate mandala patterns could take 20-30 minutes or longer.
5. Can I combine Arabic and Pakistani mehndi styles?
Yes. Urdu leafy trails and a Pakistani circular pattern are complementary and create a lively marriage.
Final Thoughts
Gol tikki mehndi is a great option for those who want to have a traditional henna design, but still want to remain tasteful and sophisticated. This design is a great choice for everything from simple floral designs to elaborate mandalas.
Simple Pakistani gol tikki mehndi designs are the ones with perfect circles, attractive floral patterns and mild decorations. Begin with simple patterns, learn the way to draw mehndi and then move onto advanced mehndi application.